This post contains affiliate links.
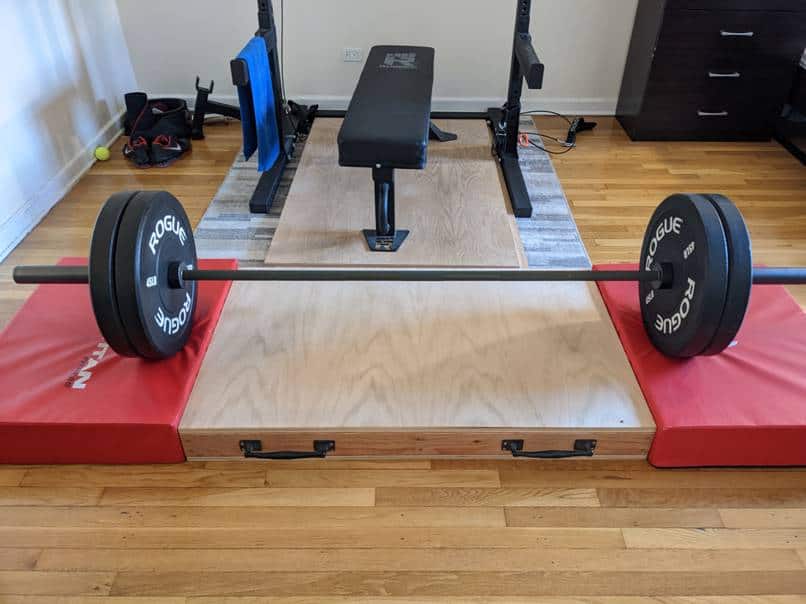
Deadlift platforms help to protect the floor and reduce noise while deadlifting. If you’re building a deadlift platform in an apartment home gym, it needs to be durable, compact, and portable.
Building this deadlifting platform was simple and fast, even for inexperienced builders. We completed it leisurely as a weekend project.
Full disclaimer: This Portable DIY Deadlift Platform is designed for small spaces. If you have a spacious garage gym, we would suggest you build a full 4’x8′ or 8’x8′ deadlift platform that stays in place.
Why didn’t we use horse stall mats?
We thought about throwing down some horse stall mats to use for deadlifting, but the odor from horse stall mats is unbearable and toxic. We drove 2 hours each way to pick up horse stall mats from Tractor Supply, but the minute we brought them into our tiny studio apartment in NYC, the room filled up with the smell of toxic chemicals. We aired it outdoors for a week, but it didn’t help. I’m not going to debate whether or not it’s actually toxic, but it wasn’t worth the potential health risk and discomfort of living in this odor.
So we went back to the drawing board to figure out how we could work around this.
Table of Contents
4 things we needed in a Deadlift Platform for the apartment
1. Noise-canceling for our neighbors
Our neighbors haven’t complained in 2 years!
2. Durable for safety
We’ve been using the platform consistently for 2 years and even tested it with a 500-pound deadlift.
3. Light enough to carry and store away
We built the platform with beams inside so it’s light but sturdy. But we’re most proud of the sturdy handles.
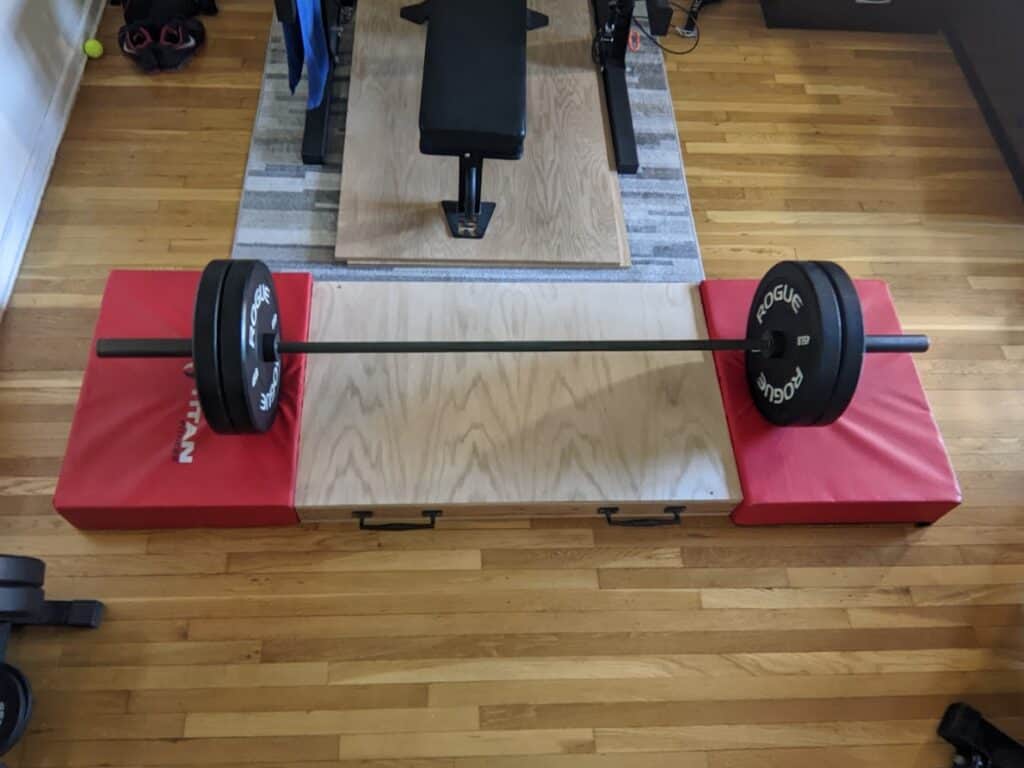
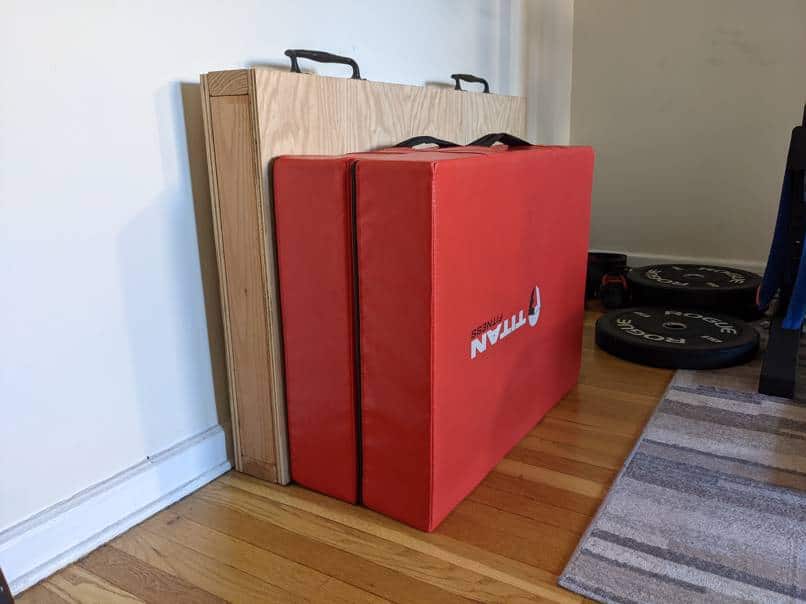
4. Compact when assembled and stored away
Assembled:
Stored away:
Ready to build? Here’s what you will need.
Materials Needed
| QTY | Item | Used For |
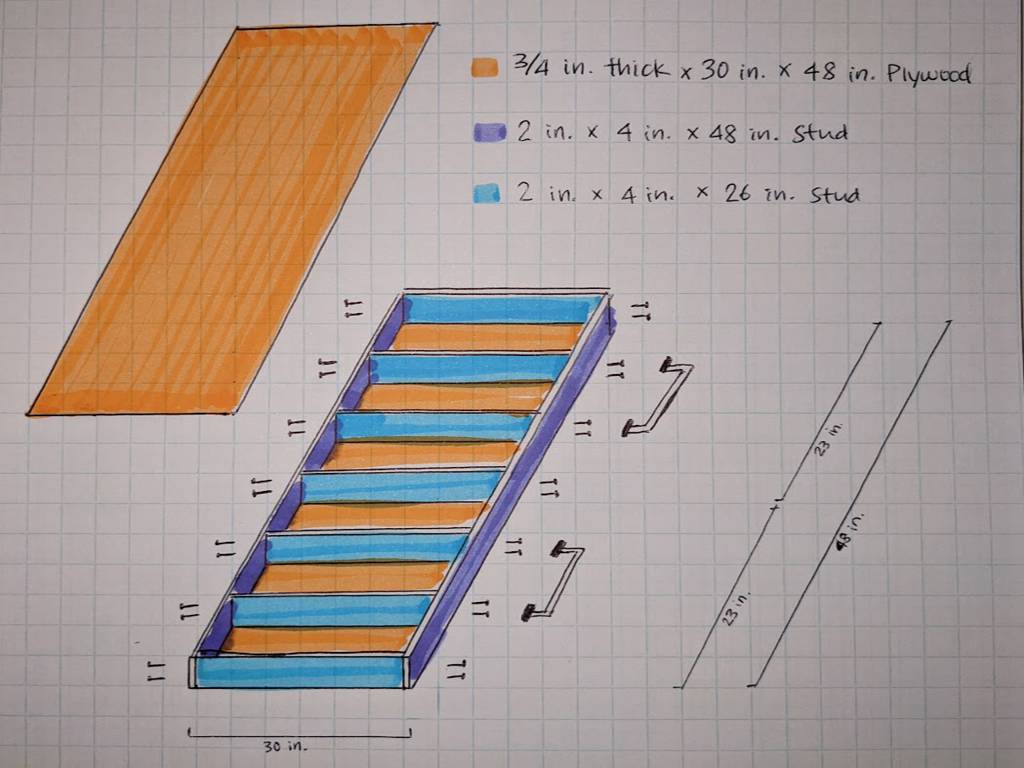
| 2 | 3/4 in. thick x 30 in. x 48 in. Plywood (we used PureBond Birch because sturdy and light) | Top & bottom surface of deadlift platform |
| 1-2 | 1/4 in. thick x 30 in. x 48 in. Plywood (optional) | Adds thickness to deadlift platform, if needed |
| 2 | 2 in. x 4 in. x 48 in. Stud1 (we used Prime Kiln-Dried Doug Fir because durable) | Beams along the long side of the deadlift platform |
| 7 | 2 in. x 4 in. x 26 in. Stud1 (we used Prime Kiln-Dried Doug Fir because durable) | Beams along the short side & support inside the deadlift platform |
| 1 | 18 fl. oz. Wood Glue | Secure first with glue |
| 1 | 9 x 3 in. Phillips Bugle-Head Construction Screw (1 lb./Box) | Then secure it with screws |
| 2 | Black Heavy-Duty Rod Iron Gate Pull | Sturdy handles for ease of carrying 100 lbs given the platform is about 70 lbs |
| 2 | Silencer Drop Pads | Protects the floor and reduces noise |
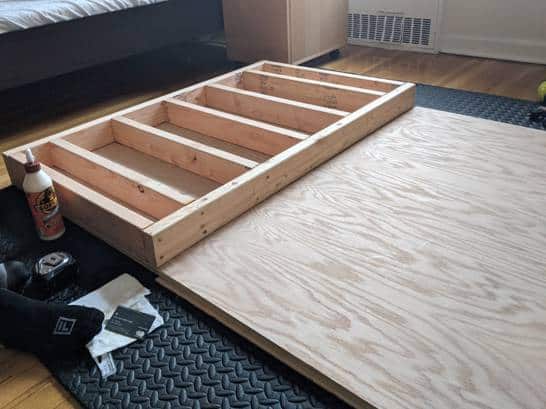
Tools Needed
Preparation Before Building the Portable Deadlift Platform
Step 1: Buy a set of silencer drop pads
What could be more noise-canceling than silencer drop pads? We went ahead and ordered silencer drop pads online. We received the Titan drop pad set and realized one was significantly thicker than the other.
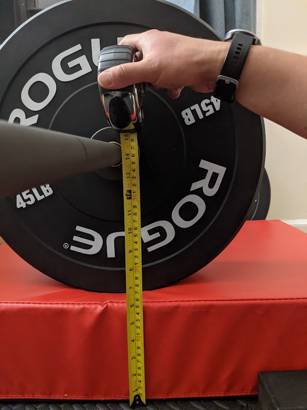
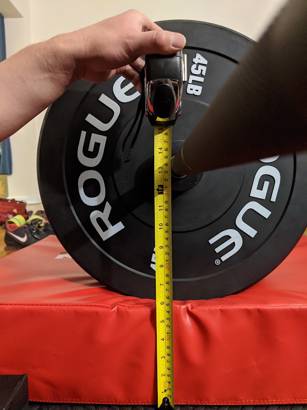
We realized there’s high variability in the thickness and firmness of the pads. But Titan is sooo inexpensive compared to the other brands! We emailed customer support with these pictures and they immediately shipped us a replacement—much better this time.
The drop pads that we use are these Titan Silencer Drop Pads: https://titan-fitness.pxf.io/9Wma7j
Step 2: Determine the width of the deadlift platform
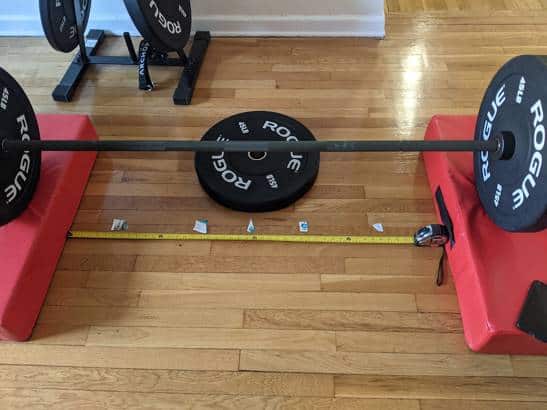
Place the drop pads exactly where you’d like them depending on the barbell length and your deadlift stance. Measure the distance between the two drop pads to determine the width of the platform.
The little pieces of paper in the picture above mark the placement of the 5 beams supporting the inside of the platform. One beam should be in the middle and the ones on the sides placed where your feet will be while deadlifting and where the handles will be drilled.
Step 3: Determine the thickness of the deadlift platform
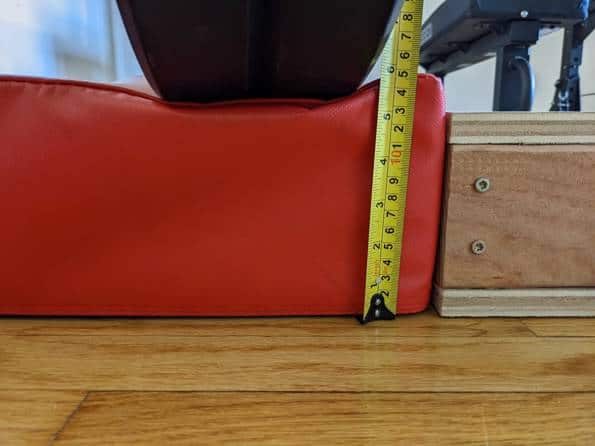
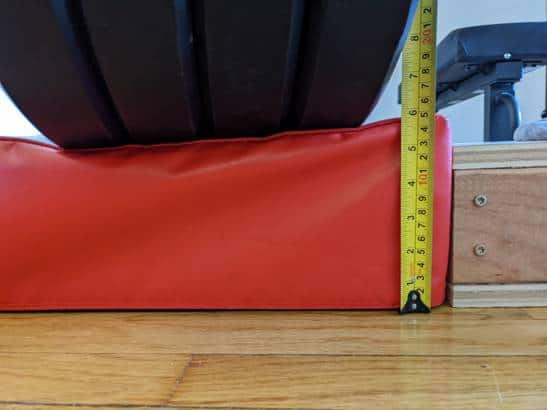
Measure the height of the drop pads with weight to determine the desired thickness of the deadlift platform.
You can choose to add or skip the 1/4 in. Plywood depending on the need to add thickness to the platform.
Step 4: Buy material for the deadlift platform
We went to Home Depot to gather all the materials. There are associates at Home Depot who can cut the wood for free, but please be prepared and considerate. Bring a diagram, pencil, paper, and measuring tape.
Building the Portable Deadlift Platform
Step 1: Lay out the bottom piece 3/4 in. thick x 30 in. x 48 in. Plywood, and measure and mark holders for the 2 in. x 4 in. studs.
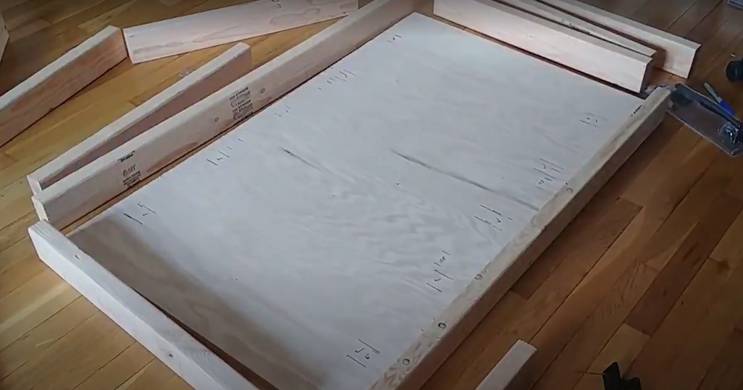
Step 2: Place the 2 in. x 4 in. studs on the marked 3/4 in. thick x 30 in. x 48 in. Plywood to make sure it fits right.
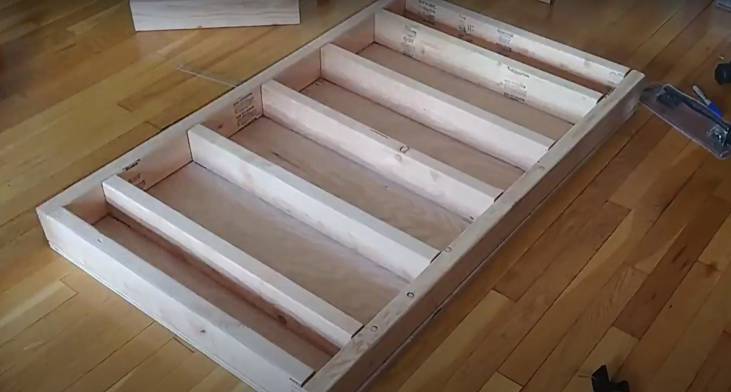
Step 3: Apply, then smooth out/distribute wood glue using a card on the 2 in. x 4 in. studs.
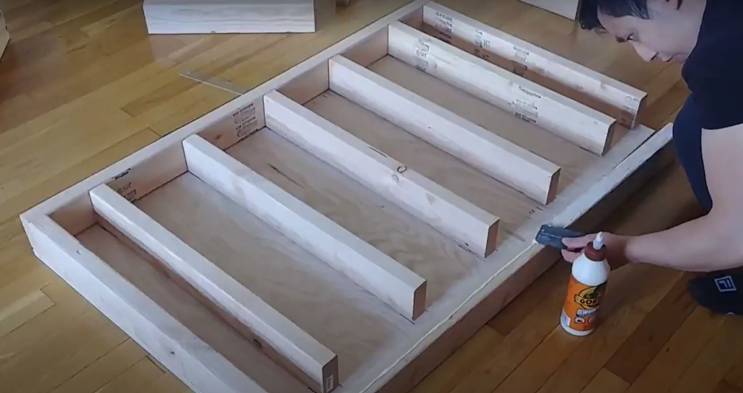
The wood glue that we used is this Gorilla Wood Glue: https://www.amazon.com/dp/B001NN5T22?tag=homestrengt0c-20
Step 4: Stack weight on the 2 in. x 4 in. studs and allow them to dry for a few hours.
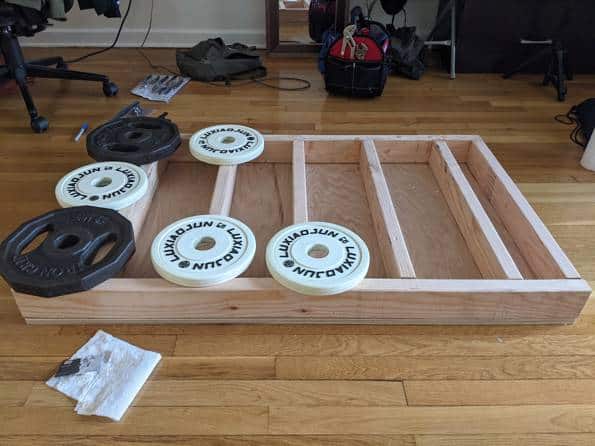
Step 5: Screw the studs to secure and don’t forget to screw the handles while you’re at it.
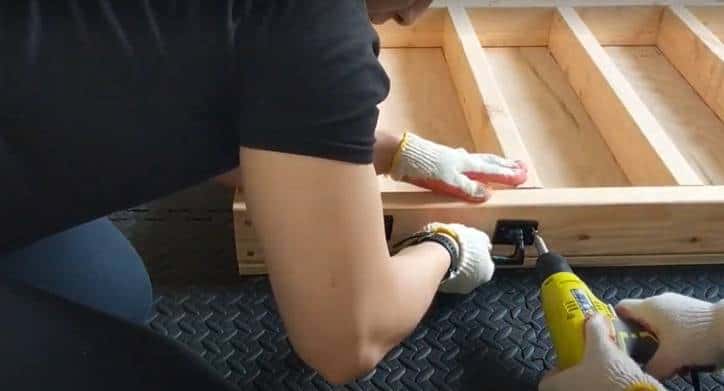
For drilling, we used the following:
- Drill: https://www.amazon.com/dp/B085ZQKQXN?tag=homestrengt0c-20,tools,78&sr=1-20&linkCode=sl1&tag=homestrengt0c-20&linkId=e651f77f8a9ba559cb3eeccab71ece92&language=en_US&ref_=as_li_ss_tl
- Drill bits: https://www.amazon.com/dp/B0045PQ762?tag=homestrengt0c-20,tools,77&sr=1-6&th=1&linkCode=sl1&tag=homestrengt0c-20&linkId=6549b78a2adae718ff688d5bfb6e17ac&language=en_US&ref_=as_li_ss_tl
- Screws: https://www.homedepot.com/p/Grip-Rite-9-x-3-in-Star-Drive-Bugle-Head-Construction-Screw-1-lb-Box-3GCS1/204959258
Step 6: Apply wood glue on the top surface of the 2 in. x 4 in. studs and smooth it out.

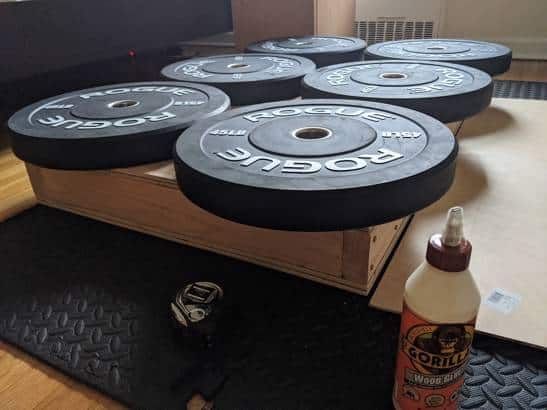
Step 7: Lay the other 3/4 in. thick x 30 in. x 48 in. Plywood on top and stack weights on top while you wait for it to dry.
HomeStrengthToolbox.com is a participant in the Amazon Services LLC Associates Program, an affiliate advertising program designed to provide a means for sites to earn advertising fees by advertising and linking to Amazon.com. We also participate in other affiliate programs which compensate us for referring traffic at no extra cost to you.
